Thursday, August 20, 2009

Meet Posey!

Our family had to take a long drive the other day down to New Jersey and I kept happily busy with this lil' pattern. Easy to design and easy to knit. It was finished in a few hours.


Pattern: Posey

Needles:
US Size #6, 4.0mm double pointed needles

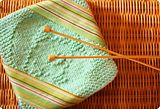
Yarn:
I used Lily's Sugar'n Cream
but any worsted weight yarn will work.

Materials:
Fiber fill or scrap yarn for stuffing,
Tapestry Needle
Stitch marker
Extra yarn for sewing.
Button
Scissor

Finished Measurements : Approx. 3"width 3½" height

Pattern:

Bottom Flower

CO 6sts arranging 2 on each needle. Join for knitting in the round and place stitch marker being careful not to twist sts.
K 1 rnd

Round 1: kfb all sts (12)
Round 2: k all sts
Round 3: kfb all sts (24)
Round 4: k all sts
Round 5: k1, kfb for entire round (36)
Round 6: k all sts
Round 7: k3, kfb for entire round (45)

Rounds 8 - 18: k all sts

Round 19: k3, k2tog for entire round (36)
Round 20: k all sts
Round 21: k1, k2tog for entire round (24)
Round 22: k all sts
Round 23: k2tog for entire round (12)
Round 24: k all sts
Round 25: k2tog for entire round (6)
Round 26: k all sts.

Break yarn leaving at least 8" and thread with tapestry needle through all 6 sts. Remove double pointed needles but do not pull closed.

Middle Flower

CO 6sts arranging 2 on each needle. Join for knitting in the round and place stitch marker being careful not to twist sts.
K 1 rnd

Round 1: kfb all sts (12)
Round 2: k all sts
Round 3: kfb all sts (24)
Round 4: k all sts
Round 5: k1, kfb for entire round (36)

Round 6- 14: k all sts

Round 15: k1, k2tog for entire round (24)
Round 16: k all sts
Round 17: k2tog for entire round (12)
Round 18: k all sts
Round 19: k2tog for entire round (6)
Round 20: k all sts.

Break yarn leaving at least 8" and thread with tapestry needle through all 6 sts. Remove double pointed needles but do not pull closed.


Top Flower

CO 6sts arranging 2 on each needle. Join for knitting in the round and place stitch marker being careful not to twist sts.
K 1 rnd

Round 1: kfb all sts (12)
Round 2: k all sts
Round 3: kfb all sts (24)

Round 4- 12: k all sts

Round 13: k2tog for entire round (12)
Round 14: k all sts
Round 15: k2tog for entire round (6)
Round 16: k all sts.

Break yarn leaving at least 8" and thread with tapestry needle through all 6 sts. Remove double pointed needles but do not pull closed.


Finishing
Repeat for all three sizes:

Stuff each layer with scrap yarn or fiberfill and shape into a flattened ball pulling thread so that the top is closed.
Measure out two 12" strands of yarn in a contrasting color.
Thread the tapestry needle with the yarn down the middle of the ball and back up around the side.
Continue going down through the middle and around the side to the top a total of six times pulling tightly to create the flower shape.
Tie a knot around a strand at the top to secure.

Stitch layers to each other and secure yarn. Add a button with some yarn for detail and your done!

Posey © KrisKnits 2009
This pattern is for personal use only.

If you have any questions about this design or need help you can leave a comment or an email at kris@krisknits.com or on Ravelry via KristenKnits. I will try and help as best I can.
Hope everyone is having a great summer!

Sunday, August 16, 2009

The Wedding Cloths...

August has been such a busy month for us. I'm kinda surprised that I was able to finish these patterns by the end of the week. But I'm very happy with the outcome and I think they are worth the wait. I took my time with everything and I know they will make wonderful gifts for couples everywhere.


This particular set of cloths is going to my best girlfriend who recently got married. Now that I've finally taken pictures and published the pattern she can finally use them in her kitchen.


This pattern is available as a PDF download and priced at $3.25. There are eight cloth patterns in this set. You can purchase this pattern by clicking the "Buy Now" button below the pictures. The Wedding Cloths are also available in my Pattern Store here as a Ravelry Download. There are 5 pages total and the download is sized at 4.4MB. If you have any questions about the pattern or payment options, please feel free to contact me via email at kris@krisknits.com or on Ravelry: KristenKnits.

Lily's Sugar'n Cream Solid:


Cake - 00082: Jute (Tan)
Heart - 00003: Cream (Off White)
Husband & Wife - 00003: Cream (Off White)
Dove - 00001: White (White)
Rings - 00082: Jute (Tan)
Chapel - 00001: White (White)
Wedding Bells - 01004: Soft Ecru (Off White)

Peaches & Cream Solid:

Champagne - 89 Camel


You don't need a Ravelry account to purchase the pattern. Ravelry will re-direct you to paypal and will email you a link to download the pattern.

I made each written pattern with a corresponding chart for the dishcloth. From the sets that I've already made, I've managed to get about 2-2½ cloths out of one ball of Lily's Sugar'n Cream Solid Yarn. Though you can use any kitchen cotton you prefer.


We're about 3 weeks from finishing all of the construction on the apartment. Then we can start moving in our furniture and Mommy can finally relax. I designed a really cute knitted pin cushion pattern recently and I'll be posting the instruction and pictures during the week. The fruit cloths are almost knitted up. I hope I can get everything together for next Sunday. I can't wait to sit down and start the Dessert cloths.

Wednesday, August 12, 2009

A Little Downtime...

We decided to take a weekend road trip with some friends to Pennsylvania over the weekend. We were able to visit family and check out some beautiful scenery. It was a nice break from our tiring routine back at home. I had a memory card malfunction and lost a lot of pictures from our trip but still managed to get a few off the card before it broke.

Somewhere in the north east region of the state we found this wonderful field of wildflowers. I would love to go back one day. It was so remarkably beautiful at twilight that it felt like a dream. The kids and I were able to walk around and play for a while before it became too dark.


There was a beautiful lake where we stayed. Victor and Ella loved watching the people fishing. I wish I could show you the great shots I got but I guess no technology is fail proof. I did manage to move over one picture of the lake at sunset though.

We're planning another trip with our friends before the end of Summer and I'll be sure to take a few memory cards and lots of photos next time.


We're still working on the apartment almost everyday and hoping to be finished and settled in by September. It has been taking forever but we've been building it from scratch by my Mother's so that I can help her out with the house. Being almost ready for paint, I'm so grateful to her and my mother-in-law for all of the babysitting.

On another note, I've been finishing up many patterns. Everything from dishcloths to baby dresses, I'm losing some sleep. I need to photograph the Wedding and Fruit sets tomorrow and start designing the PDF files. By Saturday I should have one of them up. I'm also currently working on a charity pattern for a Lupus foundation. One of my best girlfriends suffers from this disease and we're working together to create something special for the cause.

Sunday, August 9, 2009

Birthday Baking...

I haven't made these in awhile even though they are incredibly easy to create. I keep seeing different recipes for variations of the fun treat everywhere. Yesterday I decided to make some simple ice cream themed cakes to celebrate Summer and my Son's third birthday. With the camera out I decided to take some photos and write the process up for anyone who might've not seen them before. You must try them.


The first thing you want to do is pick up any instant cake mix. For these I used Pillsbury Moist Supreme Cake Mix, Golden Butter Recipe. One box of mix will yield around 30-35 cones. Any type of ice cream cone will work as long as it has a flat bottom. I prepared the mix as instructed with the correct amount of water, oil and eggs, then whisked until smooth.


Then you want to fill the cones to the level shown in the picture, any less or more will have your cupcake coming up too short or overflowing the tops of the cones. Carefully spoon in the batter trying not to get any on the outside of the cone because it will burn slightly in the oven. Arrange the cones next to each other on a cookie sheet lined with parchment paper so that the bottoms don't brown. I had to use foil because I was out of paper. I think I was able to fit 26 on the tray.


Set your oven and preheat to 350 degrees. Check your cake mix box for timing instructions. I left these in the oven for 20 minutes. Use a toothpick to make sure the centers are baked through. Cool completely for 1 hour.


After cooling I used a pastry icing bag with a long tip and filled them with whip cream. For the chocolate centers I used a milk chocolate fudge.


Using the same icing bag and a different tip I swirled some butter cream and chocolate icing on the tops of the cakes to imitate soft serve ice cream.


The kids had lots of fun decorating the icing. I know my kitchen floor had more sprinkles than all the cakes put together! You can use any topping you wish. We've used gummy bears, pretzels and crushed candy bars on other occasions.


They we're such a big hit at the party. I wish I had hid a few more in the house just for us.


Here's the recipe if anyone wants to copy and paste or print out the selection.


Ice Cream Cone
Cupcakes:

Prep Time: 20 min
Total Time: 1 hr, 30 min
Yields: 30 to 35 Cupcake Cones

Ingredients:
  • 1 box of cake mix (non swirl)
  • Water, vegetable oil or butter, eggs and anything else called for on cake mix box
  • 30 or more flat bottom cones
  • Assorted decorations and toppings
Directions:

  1. Preheat oven to 350 degrees Fahrenheit. Prepare cake mix as directed on box.
  2. Fill each cone to about halfway with batter. Stand and arrange cones on a cookie sheet.
  3. Carefully carry tray to oven and bake 20 to 25 minutes or until toothpick inserted in center of cupcake comes out clean. Cool completely 1 hour.
  4. Add frosting and decorate to your hearts desire. Store covered at room temperature.
1 Cupcake Cone : Calories 160, Total fat 7g