Showing posts with label tutorial. Show all posts

Sunday, January 3, 2010

2010, I'm Ready For You...

Happy New Year everyone!
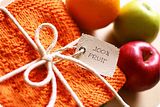
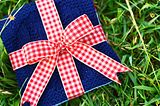
I wanted to make and share a washcloth pattern for '10. It's sized perfectly to wrap around a fragrant or hand-made soap bar. If I can find time this week I'll make some soap and brighten a friend's day with this little gift. I'm currently working on so many different things I don't know what to finish first. One of my New Year's resolutions this year is to blog and post pictures everyday. Another is to finish everything I start. I'd love to hear some of yours!


2010 New Year's Washcloth:

Finished Measurements : Approx. 4"x8½"

Materials: 1 ball Lily Sugar'n Cream Solid
US #3/3.25mm needles*
Tapestry Needle
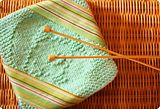
*I used a smaller needle size to obtain denser fabric and to make the picture stand out more.

Chart :


Pattern:

With Size 3 needles,
co 40s

row 1: (an all odd numbered rows) k
row 2: k
row 4: k5, p30, k5
row 6: k4, p32, p4
row 8: k3, p1, k7, p4, k3, p4, k6, (p3, k3)x2
row 10: k2, p2, k7, p3, k5, p3, k6, p2, k5, p3, k2

row 12: k2, p2, k3, p3, k1, p2, k3, p1, k3, p4, k2, p3, k3, p1, k3, p2, k2
row 14: k2, p3, k3, p5, k2, p3, k2, p4, (k2, p3)x2, k2, p2, k2
row 16: k2, p4, k3, p4, k2, p3, k2, p4, (k2, p3)x2, k2, p2, k2
row 18: k2, p5, k3, p3, k2, p3, k2, p4, (k2, p3)x2, k2, p2, k2
row 20: k2, p6, k3, p2, k2, p3, k2, p4, (k2, p3)x2, k2, p2, k2

row 22: k2, p2, k2, p3, k2, p2, k2, p3, k2, p4, (k2, p3)x2, k2, p2, k2
row 24: k2, p2, k2, p3, k2, p2, k2, p3, k2, p2, k4, (p3, k2)x2, p2, k2
row 26: k2, p2, k3, p1, k3, p2, k3, p1, k3, p2, k4, p3, k3, p1, k3, p2, k2
row 28: k2, p3, (k5, p4)x2, k3, p4, k5, p3, k2
row 30: k3, p3, (k3, p6)x2, k2, p5, k3, p3, k3

row 32: k4, p32, p4
row 34: k5, p30, k5
row 36: k
row 38: k

row 39: Bind Off


Weave in ends.

Block and lay flat to dry

Hanging loop:

When binding off the final row leave 3 remaining stitches and knit an I-cord for 3". BO and sew the end of the cord to the underside of the cloth where the I-cord started.

I'm almost finished with a new set of Dessert Cloths. I can't wait to publish and make them available. I'm also going to start a free KrisKnits' Monthly KAL (Knit-Along) starting this week. Every month will feature a full-size themed picture dishcloth. I'll post more about it tomorrow and hopefully get the first couple rows up for everyone to start together.
Happy Knitting!

Tuesday, December 22, 2009

Holiday Pancakes..

I always make special pancakes for breakfast Christmas morning and after finding this easy recipe I couldn't wait to Friday to try it out. The kids actually ate their entire breakfast today. I wish you could smell how amazing these are.


Holiday Apple Pancakes:

Ingredients

  • 1 3/4 cups all-purpose flour, plus more as needed
  • 3 tablespoons sugar
  • 1 tablespoon baking powder
  • 1/4 teaspoon fine salt
  • 1/8 teaspoon freshly ground nutmeg
  • 2 large eggs at room temperature
  • 1 1/4 cups milk at room temperature
  • 1/2 teaspoon vanilla extract
  • 3 tablespoons unsalted butter, plus more as needed
  • 4 Macintosh or other small apples
  • Warm maple syrup, as an accompaniment if desired
Directions

Preheat the oven to 200 degrees F. Set a wire rack on a baking sheet and place in the oven.

Whisk 1 3/4 cups flour, baking powder, the sugar, salt and nutmeg in a large bowl. In small bowl, whisk the eggs with the milk and vanilla extract. Melt 3 tablespoons butter in a large well-seasoned cast-iron or non stick skillet over medium heat. Whisk the butter into the milk mixture. Add the liquid ingredients to the dry mixture, and whisk just long enough to make a thick batter, (if there are a few lumps that's okay).

Using a melon baler or an apple corer, peel and core the apples keeping them whole. Slice the apples crosswise to make 1/4-inch rounds or O's. Put some flour on a plate and dredge the apple slices until lightly coated, shaking off any excess flour.

In the same skillet over medium to medium-low heat, place 3 apple slices next to eachother in the skillet. Cook without turning until browned, about 60 seconds. Ladle about 2 tablespoons of the batter over each apple ring. Cook, until bubbles break the surface of the pancakes, and the undersides are golden brown, about 2 to 3 minutes. Add a nut-sized bit of butter to the skillet, as needed, and flip the pancakes, cook until golden on the underside, about 1 minute more.

Serve immediately or transfer to oven to keep warm. Repeat with the remaining apples and batter. This recipe can be found at FoodNetwork.com

Whipped Cream:

Ingredients:

  • 1 cup of heavy whipping cream
  • 2 teaspoons of granulated sugar


In stainless steel bowl that has been chilled add the cream and sugar and wisk until small peaks form in the whipped cream.

Glazed Pecans:

Add about 3 teaspoons of granulated sugar to skillet and add just enough water to wet the sugar, about 1 teaspoon. Heat the skillet over medium heat until sugar starts to bubble. Mix in 1/4 cup of pecans and and cook for 1 to 2 minutes. Place pecans on wire rack to dry

Happy Holiday's Everyone!

Tuesday, September 29, 2009

Painted Letters...

I'm sorry I haven't updated the blog in awhile. We've been busier than normal and most days I don't even have a chance to turn the computer on. I've made lots of progress on my current projects and will be posting pictures throughout this week. I finally ended up painting those wooden letters for Victor and Ella's room. I am so pleased with the way they turned out. Using only blue painters tape, acrylic paint and a few brushes they were done in no time.

Using a four shaded color scheme I gave every letter two coats of Anita's All Purpose Acrylic Craft Paint in 11001 White to start. When dried, I started taping sections off with the blue painters tape making sure that the edge to be painted was pressed down firmly. To make it go quicker I placed two sections of tape on each letter creating three empty areas to be painted. I painted each of these areas a different color. If you look closely you'll notice there are two sections of the same color in each letter. These are the areas where the tape was placed first. After a few coats in the three sections and some drying time, I then taped off the next two areas to be painted leaving some white on either side for the striped effect. For each letter the color that you paint these last two areas will always be the color you haven't used yet.


These are the colors I used.

Ella's Color Scheme:

Anita's Acrylic Craft Paint
11090 Melted Butter (yellow)
11170 Hot Pink (pink)

Folk Art Acrylic Paint
633 Baby Pink (lt pink)
526 Soft Apple (lt green)


Victor's Color Scheme:

Anita's Acrylic Craft Paint
11009 Medium Blue (drk blue)
11064 Morning Blue ( lt blue)
11056 Ocean Blue (drk green)
11036 Seafoam Green (lt green)


I truly love the look of these for any baby or children's room. They add just the right amount of personal touch to any decor. If you have any questions about the process to make these send me an email or leave a comment and I will try to help. Hope everyone is well and enjoying this new autumn season.

Thursday, August 20, 2009

Meet Posey!

Our family had to take a long drive the other day down to New Jersey and I kept happily busy with this lil' pattern. Easy to design and easy to knit. It was finished in a few hours.


Pattern: Posey

Needles:
US Size #6, 4.0mm double pointed needles

Yarn:
I used Lily's Sugar'n Cream
but any worsted weight yarn will work.

Materials:
Fiber fill or scrap yarn for stuffing,
Tapestry Needle
Stitch marker
Extra yarn for sewing.
Button
Scissor

Finished Measurements : Approx. 3"width 3½" height

Pattern:

Bottom Flower

CO 6sts arranging 2 on each needle. Join for knitting in the round and place stitch marker being careful not to twist sts.
K 1 rnd

Round 1: kfb all sts (12)
Round 2: k all sts
Round 3: kfb all sts (24)
Round 4: k all sts
Round 5: k1, kfb for entire round (36)
Round 6: k all sts
Round 7: k3, kfb for entire round (45)

Rounds 8 - 18: k all sts

Round 19: k3, k2tog for entire round (36)
Round 20: k all sts
Round 21: k1, k2tog for entire round (24)
Round 22: k all sts
Round 23: k2tog for entire round (12)
Round 24: k all sts
Round 25: k2tog for entire round (6)
Round 26: k all sts.

Break yarn leaving at least 8" and thread with tapestry needle through all 6 sts. Remove double pointed needles but do not pull closed.

Middle Flower

CO 6sts arranging 2 on each needle. Join for knitting in the round and place stitch marker being careful not to twist sts.
K 1 rnd

Round 1: kfb all sts (12)
Round 2: k all sts
Round 3: kfb all sts (24)
Round 4: k all sts
Round 5: k1, kfb for entire round (36)

Round 6- 14: k all sts

Round 15: k1, k2tog for entire round (24)
Round 16: k all sts
Round 17: k2tog for entire round (12)
Round 18: k all sts
Round 19: k2tog for entire round (6)
Round 20: k all sts.

Break yarn leaving at least 8" and thread with tapestry needle through all 6 sts. Remove double pointed needles but do not pull closed.


Top Flower

CO 6sts arranging 2 on each needle. Join for knitting in the round and place stitch marker being careful not to twist sts.
K 1 rnd

Round 1: kfb all sts (12)
Round 2: k all sts
Round 3: kfb all sts (24)

Round 4- 12: k all sts

Round 13: k2tog for entire round (12)
Round 14: k all sts
Round 15: k2tog for entire round (6)
Round 16: k all sts.

Break yarn leaving at least 8" and thread with tapestry needle through all 6 sts. Remove double pointed needles but do not pull closed.


Finishing
Repeat for all three sizes:

Stuff each layer with scrap yarn or fiberfill and shape into a flattened ball pulling thread so that the top is closed.
Measure out two 12" strands of yarn in a contrasting color.
Thread the tapestry needle with the yarn down the middle of the ball and back up around the side.
Continue going down through the middle and around the side to the top a total of six times pulling tightly to create the flower shape.
Tie a knot around a strand at the top to secure.

Stitch layers to each other and secure yarn. Add a button with some yarn for detail and your done!

Posey © KrisKnits 2009
This pattern is for personal use only.

If you have any questions about this design or need help you can leave a comment or an email at kris@krisknits.com or on Ravelry via KristenKnits. I will try and help as best I can.
Hope everyone is having a great summer!

Sunday, August 9, 2009

Birthday Baking...

I haven't made these in awhile even though they are incredibly easy to create. I keep seeing different recipes for variations of the fun treat everywhere. Yesterday I decided to make some simple ice cream themed cakes to celebrate Summer and my Son's third birthday. With the camera out I decided to take some photos and write the process up for anyone who might've not seen them before. You must try them.


The first thing you want to do is pick up any instant cake mix. For these I used Pillsbury Moist Supreme Cake Mix, Golden Butter Recipe. One box of mix will yield around 30-35 cones. Any type of ice cream cone will work as long as it has a flat bottom. I prepared the mix as instructed with the correct amount of water, oil and eggs, then whisked until smooth.


Then you want to fill the cones to the level shown in the picture, any less or more will have your cupcake coming up too short or overflowing the tops of the cones. Carefully spoon in the batter trying not to get any on the outside of the cone because it will burn slightly in the oven. Arrange the cones next to each other on a cookie sheet lined with parchment paper so that the bottoms don't brown. I had to use foil because I was out of paper. I think I was able to fit 26 on the tray.


Set your oven and preheat to 350 degrees. Check your cake mix box for timing instructions. I left these in the oven for 20 minutes. Use a toothpick to make sure the centers are baked through. Cool completely for 1 hour.


After cooling I used a pastry icing bag with a long tip and filled them with whip cream. For the chocolate centers I used a milk chocolate fudge.


Using the same icing bag and a different tip I swirled some butter cream and chocolate icing on the tops of the cakes to imitate soft serve ice cream.


The kids had lots of fun decorating the icing. I know my kitchen floor had more sprinkles than all the cakes put together! You can use any topping you wish. We've used gummy bears, pretzels and crushed candy bars on other occasions.


They we're such a big hit at the party. I wish I had hid a few more in the house just for us.


Here's the recipe if anyone wants to copy and paste or print out the selection.


Ice Cream Cone
Cupcakes:

Prep Time: 20 min
Total Time: 1 hr, 30 min
Yields: 30 to 35 Cupcake Cones

Ingredients:
  • 1 box of cake mix (non swirl)
  • Water, vegetable oil or butter, eggs and anything else called for on cake mix box
  • 30 or more flat bottom cones
  • Assorted decorations and toppings
Directions:

  1. Preheat oven to 350 degrees Fahrenheit. Prepare cake mix as directed on box.
  2. Fill each cone to about halfway with batter. Stand and arrange cones on a cookie sheet.
  3. Carefully carry tray to oven and bake 20 to 25 minutes or until toothpick inserted in center of cupcake comes out clean. Cool completely 1 hour.
  4. Add frosting and decorate to your hearts desire. Store covered at room temperature.
1 Cupcake Cone : Calories 160, Total fat 7g


Wednesday, July 15, 2009

Dishcloth Q & A...

I've received a lot of emails this year on ways to make my dishcloths and other cloth patterns the best they can be. I figured an easy way to help everyone out was to write up a list of frequently asked questions and add some tips and tricks. Please forgive me if I leave something out. If you have another question, leave a comment on this post and I will add it to the entry.


1. "My dishcloths aren't popping the way they should. Is there anything I can do?"

Yes! There are a lot of different ways to make sure that your cloths look the best. I'm going to go over the basics in this post to ensure that the finished cloth looks great for both gift giving and regular use.


2. "Should I really be using a US size 3 needle?"

Yes and no. It depends on how tight or loose you knit. I knit continental and always use a size 3 needle. I invested in a pair of addi turbos last year for my dishcloth knitting and designing. It was the best decision I made. With the addi's my hands won't hurt and my knitting is faster and significantly more even producing a better defined cloth. If you find that you are unable to knit with a smaller needle or don't have one available, you can use a different size and get a well defined cloth as long as your knitting is very even.


3. "The picture on the cloth is hard to see. I think my knitting is uneven, what can I do?"

If your seeing gaps in between the rows on the wrong or right side of your cloth you might be "rowing out". It's a common problem that affects many knitters. It is most obvious in stockinette or reverse stockinette and is caused when there is a different amount of tension on the yarn while knitting a stitch than while purling a stitch. The fastest way you can correct this problem is to use a different size needle for the knit rows and the purl rows. It may take some time to figure out which two to use though. People generally knit slightly tighter than they purl, but It could be the other way around. You might want to try tightening your stitches on one side or the other to see if there is an improvement. Blocking can also help equalize the tension in the stitches. It might be a few wash and dry sessions before the cloth is completely smooth in the stockinette areas.

I also try to knit an entire cloth in one sitting. I find that if I start and stop a cloth too many times that the stitches pull slightly on the needle for that particular row and create some unevenness when picked back up again. I move my knitting around so much because of the kids. Though I'm sure if it just sat still for awhile there wouldn't be too much of a tension problem.


4. What are the best colors and yarn to use for your dishcloths?"

I tend to use any cotton yarn I have around the house. It's kinda scary exactly how much I have stashed. I should take a picture to show you one of these days. You can use acrylic yarns as well but they are not as absorbent and could scratch some surfaces if you don't pay attention. Wool will obviously pill and felt if washed with hot water.

When it comes to colors your going to see the best results on a medium shade. Very light and dark colors may only show in the right light. Generally with dishcloths or any other picture design if light is directly overhead the picture may be hard to see unless your knitting is very even and the cloth is blocked after use.


5. How do you block your dishcloths?"

After I finish knitting my cloths I weave in all the ends and then soak them in warm water stretching the cloth slightly under the water to even out any tension problems. Then lightly ring out the water trying not to distort the shape too much. I tend to lay the cloths out on my counter top to dry shaping them into squares and pushing down all of the stockinette areas so that the purl bumps stand up. This makes a huge difference! There is no need to pin them and they dry in about an evening. I've only blocked the cloths I keep once or twice and then they go into the washer and dryer with the towels. they come out great every time!


6. What is the best way to photograph the finished cloths?"

After the cloths are blocked and dry I use natural light to my advantage to show the best picture. I will arrange them in front of a sunny window out of direct light. I like to photograph on sunny days to show colors in their true form. Not an easy thing with all of that rain we've been having. You can also use light from a lamp. Just be sure that the light is shining down on an angle from top to bottom to show the shaded areas from the purl bumps. Try to avoid using a flash because this can diffuse the stitch definition of knit and purl stitches.

I always try to take pictures in the morning, around 10am with light shining in from a south window. The later in the day it is, the more likely your colors may come out darker.


A few other things:

  • Fact: The more use a cloth gets the more the design will "pop" over time.
  • I actually do use the cloths I make for my kitchen and bathroom. The kids love to play with them in the bathtub and in the backyard. I don't manage to keep many sets though. I always have a reason to gift them.
  • I use a Canon Digital Rebel XSi 12.2 MP Digital SLR Camera to photograph all of my cloths.
  • I find most of my colors in A.C.Moore but I do frequent Michael's and Walmart as well. Sometimes a LYS will have a discontinued color and I'll quickly grab it. You can find most colors online or try the trade or sell feature on Ravelry to see if you can snag a deal.
  • I design and love every bit of my cloths from drawing up a chart to writing the pattern to knitting, editing the pictures and graphically designing the pdf files from scratch in Adobe Photoshop. Every cloth and pattern is an original design.
  • There are about 5 or 6 more sets for this year that I'm currently working on and of course, I'm really enjoying them.

I'm sure I forgot a few things but I didn't want to wait any longer to write this up and share some of the questions I get. Again if you have any other questions leave a comment and I'll answer it the best I can.

The Beach Cloths are almost done. Hopefully by the end of the week! I'm also working on a cute little non-dishcloth pattern for everyone.

Wednesday, May 13, 2009

A Few More Baby Gifts...

It seems like every weekend this month I have another baby shower to go to. I always try to make something special and handmade for the Mom-to-be. While browsing Flickr the other day, I saw this tutorial and decided that it would make the perfect gift for a friend who's having a baby boy in July. I think the outcome was well worth all the cutting and sewing.

It's a pretty straight forward, easy to follow tutorial. I would definitely recommend it if you have some extra time on the weekend. I loved looking through my fabric stash to find matching colors.

You can't tell in the photos but I did add something extra to these adorable blocks. I picked up some round mesh jingle toys from the store and put them in the middle of the fiberfill when I stuffed them. Any baby will love the sounds they make when bounced on the floor.

I think I managed to finish everything in one evening while (not really) watching Disney's Cars in the living room with the kids.

I'm still working steadily on a few more cloth sets for this month. I might even be able to finish everything I hoped for. There's also a lot of exciting things happening around us. One being the fact that our new home will finally be finished next month and I get to pack up all of our belongings and move again. This time it will be permanent and that makes this Mommy very happy.

Monday, May 4, 2009

Mother's Day Cloth...

I apologize for the little hiatus this blog has taken in the past few weeks. I'm only now starting to feel like myself again. While holding my son and talking to a neighbor one afternoon I suffered a severe corneal abrasion when Victor turned his head (and baseball cap) unexpectedly into my right eye. The brim of the cap had torn off all the skin on my cornea. Completely covering my pupil I was instantly unable to see. After a trip to the hospital and follow-up visits with the Optometrist every day for a week, I still have very blurry vision in the affected eye and that could take months to correct itself. I'm slowly getting used to the difference in vision. I'm just thankful that the pain is gone. Apparently the cornea has the most concentrated nerve endings in the entire human body. I wish I didn't have to learn that fact the hard way.


I haven't been on the computer that much lately but everyday it's getting easier to read and do more work online. I couldn't resist at least trying to get a finished cloth out for Mother's Day. There are several days left if you still need to make something extra for Mom on her day. Hope everyone will enjoy this cloth. It's a fun pattern that you can make year round just to show how much you appreciate everything she does.


Mother's Day Cloth:

Needles: US Size #3, 3.25mm
(You can use larger needles but might end up with a less defined picture)

Yarn:
Lily's Sugar'n Cream
or any other kitchen cotton yarn.
I used the color Rose Pink

Materials:

Tapestry Needle

Pattern:

CO 47s

row 1: (an all odd numbered rows) k
row 2: k
row 4: k
row 6: k
row 8: k4, p39, k4
row 10: k4, p39, k4

row 12: k4, p4, k2, p5, k2, p4, k5, p4, k2, p5, k2, p4, k4
row 14: k4, (p5, k1)x2, p4, k2, p3, k2, p4, (k1, p5)x2, k4
row 16: k4, (p5, k1)x2, p3, k2, p5, k2, p3, (k1, p5)x2, k4
row 18: k4, (p5, k1)x2, p3, k2, p5, k2, p3, )k1, p5)x2, k4

row 20: k4, p5, k1, (p2, k1)x2, p3, k2, p5, k2, p3, (k1, p2)x2, k1, p5, k4
row 22: k4, p5, k1, p1, k3, p1, k1, p3, k2, p5, k2, p3, k1, p1, k3, p1, k1, p5, k4
row 24: k4, p5, k3, p1, k3, p4, k2, p3, k2, p4, k3, p1, k3, p5, k4
row 26: k4, p4, k3, p3, k3, p4, k5, p4, k3, p3, k3, p4, k4
row 28: k4, p39, k4

row 30: k4, p14, k1, p24, k4
row 32: k4, p13, k1, p1, k1, p23, k4
row 34: k4, p12, k1, p3, k1, (p6, k1)x2, p8, k4
row 36: k4, p11, (k1, p2)x2, k1, p4, k3, p4, k1, p1, k1, p7, k4
row 38: k4, p10, k1, p2, k3, p2, k1, p2, k2, p1, k2, p2, k1, p3, k1, p6, k4

row 40: k4, p9, k1, p2, k5, p2, k3, p3, k3, (p2, k1)x2, p5, k4
row 42: k4, p8, k1, p2, (k3, p1)x2, k2, p2, (k1, p2)x2, k3, p2, k1, p4, k4
row 44: k4, p8, k1, p2, k2, p3, k4, p2, (k1, p2)x2, k5, p2, k1, p3, k4
row 46: k4, p8, k1, p5, k1, (p2, k2)x2, p1, k1, p2, k3, p1, k3, p2, k1, p2, k4
row 48: k4, p9, k1, p3, k5, p2, k3, p1, k1, p2, k2, p3, k2, p2, k1, p2, k4

row 50: k4, p10, k3, p2, k2, p2, k4, p1, k1, (p5, k1)x2, p2, k4
row 52: k4, p14, k2, p2, k5, p2, k1, p3, k3, p3, k1, p3, k4
row 54: k4, p3, k8, p2, k2, p2, k7, p2, k3, p2, k4, p4, k4
row 56: k4, p3, k1, p2, k2, p2, (k1, p2)x2, k7, p1, k1, p8, k1, p5, k4
row 58: k4, p6, k2, p5, k1, p2, k6, p3, k6, p2, k1, p5, k4

row 60: k4, p6, k2, p5, k1, p2, k5, p2, k1, p2, k5, p2, k1, p5, k4
row 62: k4, p6, k2, p5, k1, p3, k3, p2, k3, p2, k3, p3, k1, p5, k4
row 64: k4, p6, k2, p5, k2, p6, k2, p1, k2, p6, k2, p5, k4
row 66: k4, p3, k1, p2, k2, p2, k1, p3, k2, p4, k2, p3, k2, p4, k2, p6, k4
row 68: k4, p3, k8, p4, k6, p5, k6, p7, k4

row 70: k4, p39, k4
row 72: k4, p39, k4
row 74: k
row 76: k
row 78: k
row 80: k


row 81: Bind Off to last 3 sts, begin knitting I-cord.
Knit for 3" and BO. Fasten to underside of cloth with tapestry needle.


Weave in ends.

Block and lay flat to dry


I have also recently started a set of Baby Cloths that I know your going to absolutely fall in-love with. I'm really trying to finish up all the knitting and editing to have them published by Friday. I'm a little behind on emails this week and I apologize again. I'll be "child free" for 5 hours or so tomorrow morning and will be getting to every message I have.

Monday, April 20, 2009

Fetch !...

While staring at my enormous stash last week all I could think to myself was, "What am I going to do with all this cotton?". It really is taking over the craft room and all the baskets that I keep my yarn in. I can't seem to resist the beautiful colors that our local stores carry. I will always knit dishcloths but what about the left overs that will never make up a whole cloth? I've had this idea in my head for quite some time now. I think I attempted making one about two years ago but with new babies and having to move it was left unfinished. Needing a break from the sweater I'm currently working on, I sat down and wrote up the pattern for everyone. My son and I had fun trying to come up with a name.

Everyone I know loves knitting for their pets. This is a fast and easy to follow pattern that uses simple increases and decreases then seaming up with mattress stitch. Great for a beginner that is looking to practice some shaping. I know I'll be making a few for Christmas this year. The pattern is also easily adaptable for larger dogs. Just add more stitches to the cast on areas and then increase the number of rows that you knit in plain stockingnet stitch for a longer bone.


Here's the pattern page on Ravelry!

Pattern: Fetch !

Needles:
US Size #6, 4.0mm

Yarn:
Lily's Sugar'n Cream
or any other kitchen cotton yarn.

Materials:
Fiber fill or scrap yarn for stuffing,
Tapestry Needle
Strong yarn for seaming up.
( I used Patons Grace )
Scissor

Pattern: (Make 2)

CO 6sts

Row 1: K all sts
Row 2 (WS) and all even rows : P all sts
Row 3: Kfb, K4, Kfb (8 sts)
Break yarn and push sts back to end of needle.

CO 6sts on other needle.
Repeat rows 1-3 but don't break the yarn.
You should now have both pieces on one needle. Slide them together and P all sts (16 sts)
(*Tip: After purling the first 8 sts Grab the tail yarn (from the next piece) with the working yarn and P 1 st, this will secure it. Then drop the tail yarn and continue the row with working yarn. Be sure to treat that stitch as one on the next (RS) row.

Rows 7-10: (K one row, P one row) (2x)

Row 11: K1, SSK, K10, K2tog, K1
Row 13: K1, SSK, K8, K2tog, K1
Row 15: K1, SSK, K6, K2tog, K1
Row 17, K1, SSK, K4, K2tog, K1

Rows 19-30:
(K one row, P one row) (6x)

Row 31: Kfb, K6, Kfb
Row 33: Kfb, K8, Kfb
Row 35: Kfb, K10, Kfb
Row 37: Kfb, K12, Kfb

Rows 39-42: (K one row, P one row) (2x)

Row 43: K1, SSK, K2, K2tog, K1, Turn work keeping remaining 8 sts on right needle

Row 44:
Purl the 6 sts that were just worked.

Row 45: K 6 sts
Row 46: P 6 sts

Row 47: BO 6 sts, Break yarn.

Join yarn to remaining sts on (RS) and repeat rows 43-47.


Finishing:

Place both sides together wrong sides facing. With strong yarn thread tapestry needle and begin mattress stitching the sides and using a shoulder seam for joining the two halves together for the ends of the bone This video from Berroco might help if you get stuck. (I started seaming about half an inch down from the top right corner and continued counter-clockwise.) Once you have about 2" left begin stuffing the bone with fiberfill or scrap yarn. Finish seaming and secure ends. Pull thread through and cut with scissors from other side to hide it.

Here is a photo of how I used the Mattress Stitch to close the toy:


*A note about Fetch! and any other handmade toy that you use with your pets:
This toy is intended to be used only with owner's supervision. Do not leave your pet unattended with such toys because if ripped apart or damaged it could pose as a choking hazard. Check toy regularly for signs of wear and replace if necessary. (They're very fast to make!)

Fetch! © KrisKnits 2009
This pattern is for personal use only.


If you have any questions about this design or need help you can leave a comment or an email at kris@krisknits.com or on Ravelry via KristenKnits. I will try and help as best I can. I have been really swamped as of late and I apologize for any inconvenience. This week I'm cracking down to finish everything. Hope everyone is enjoying the better weather.


Friday, March 27, 2009

Babies..Babies...

They're everywhere these days, how could you not smile. It seems like every week there's something to knit or sew for another baby shower or welcoming gift and I'm perfectly alright with this. Last week I had heard of another baby shower and started the hunt for something sweet and memorable for the new arrival and his family.


Browsing through Ravelry late one night as I normally do, I spotted a perfect tiny design and decided to jump on the "owl-bandwagon". After seeing all of the beautiful sweaters that were made from the Owls pattern by Kate Davies I wanted the finished look but an adult sweater was too much of a commitment last month.


Pattern: Owl Baby Vest by Jodi Haraldson
Yarn: Lion Brand Cotton Ease in Stone and Lake
Needles: US #5 3.75mm
Gauge: 22 stitches & 30 rows to 4"

Here's the project page on Ravelry!

I finished the vest in a day and it's already wrapped and ready to go for next week. I made a few changes to the pattern. I made a 0-3 month size by omitting one of the cabled owls in the pattern and going up one needle size. The finished circumference is 16" with a height of 9". I left out buttons for the eyes and embroidered them instead with the trim color.


I'm very happy with how this turned out and how fast it was knitting in the round for a newborn. Lately I've been attempting to use up most of my stash yarn that's been sitting for too long. I haven't used these colors for at least a year. It's a good thing I keep everything in ziploc bags.

On another note I should have everything finished for the Easter Cloths by Monday the latest. Thank you so much to everyone for all of your support. Art and design have always been my life and I feel so blessed to be able to share it with you.

Tuesday, March 17, 2009

Taking A Break...

That title might be a little misleading though. We all need to take breaks from time to time to balance work and family. I however needed a break the other day from my regular knitting and pattern writing to just sit in front of the TV with my kids and work up a mindless garter bib for a friends baby. The outcome was too cute for words. I had found some mystery gray cotton/acrylic yarn at my Mother's last week and took it home instead of letting it sit for a for another year. I think it became something quite lovely.


I'ts a very simple and generic bib pattern. Using US size 6 needles I cast on 40 sts and knit in garter for about 6". Then bound off 30 sts and continued in garter for around 9-10" adding a yarn over button hole a few rows before I bound those stitches off. Sewed a Button in the correct place then traced and cut a felt whale and embroidered it on. Start to finish with the applique it took me under 2 hrs, but I tend to knit very fast when I'm distracted by television.


I'm really going to make it a point to start updating more often. So many projects make it off my needles before I ever get a chance to photograph and share them with you. I've been lacking a bit in the sleep department lately, but that happens when I try and do too much at once. It seems I never truly stop working. I'm sure any Mother will say that, and with love too.

Here's a link to this projects Ravelry page!